Battery Array Project

Evan,


Simple. Unbolt the hitch.

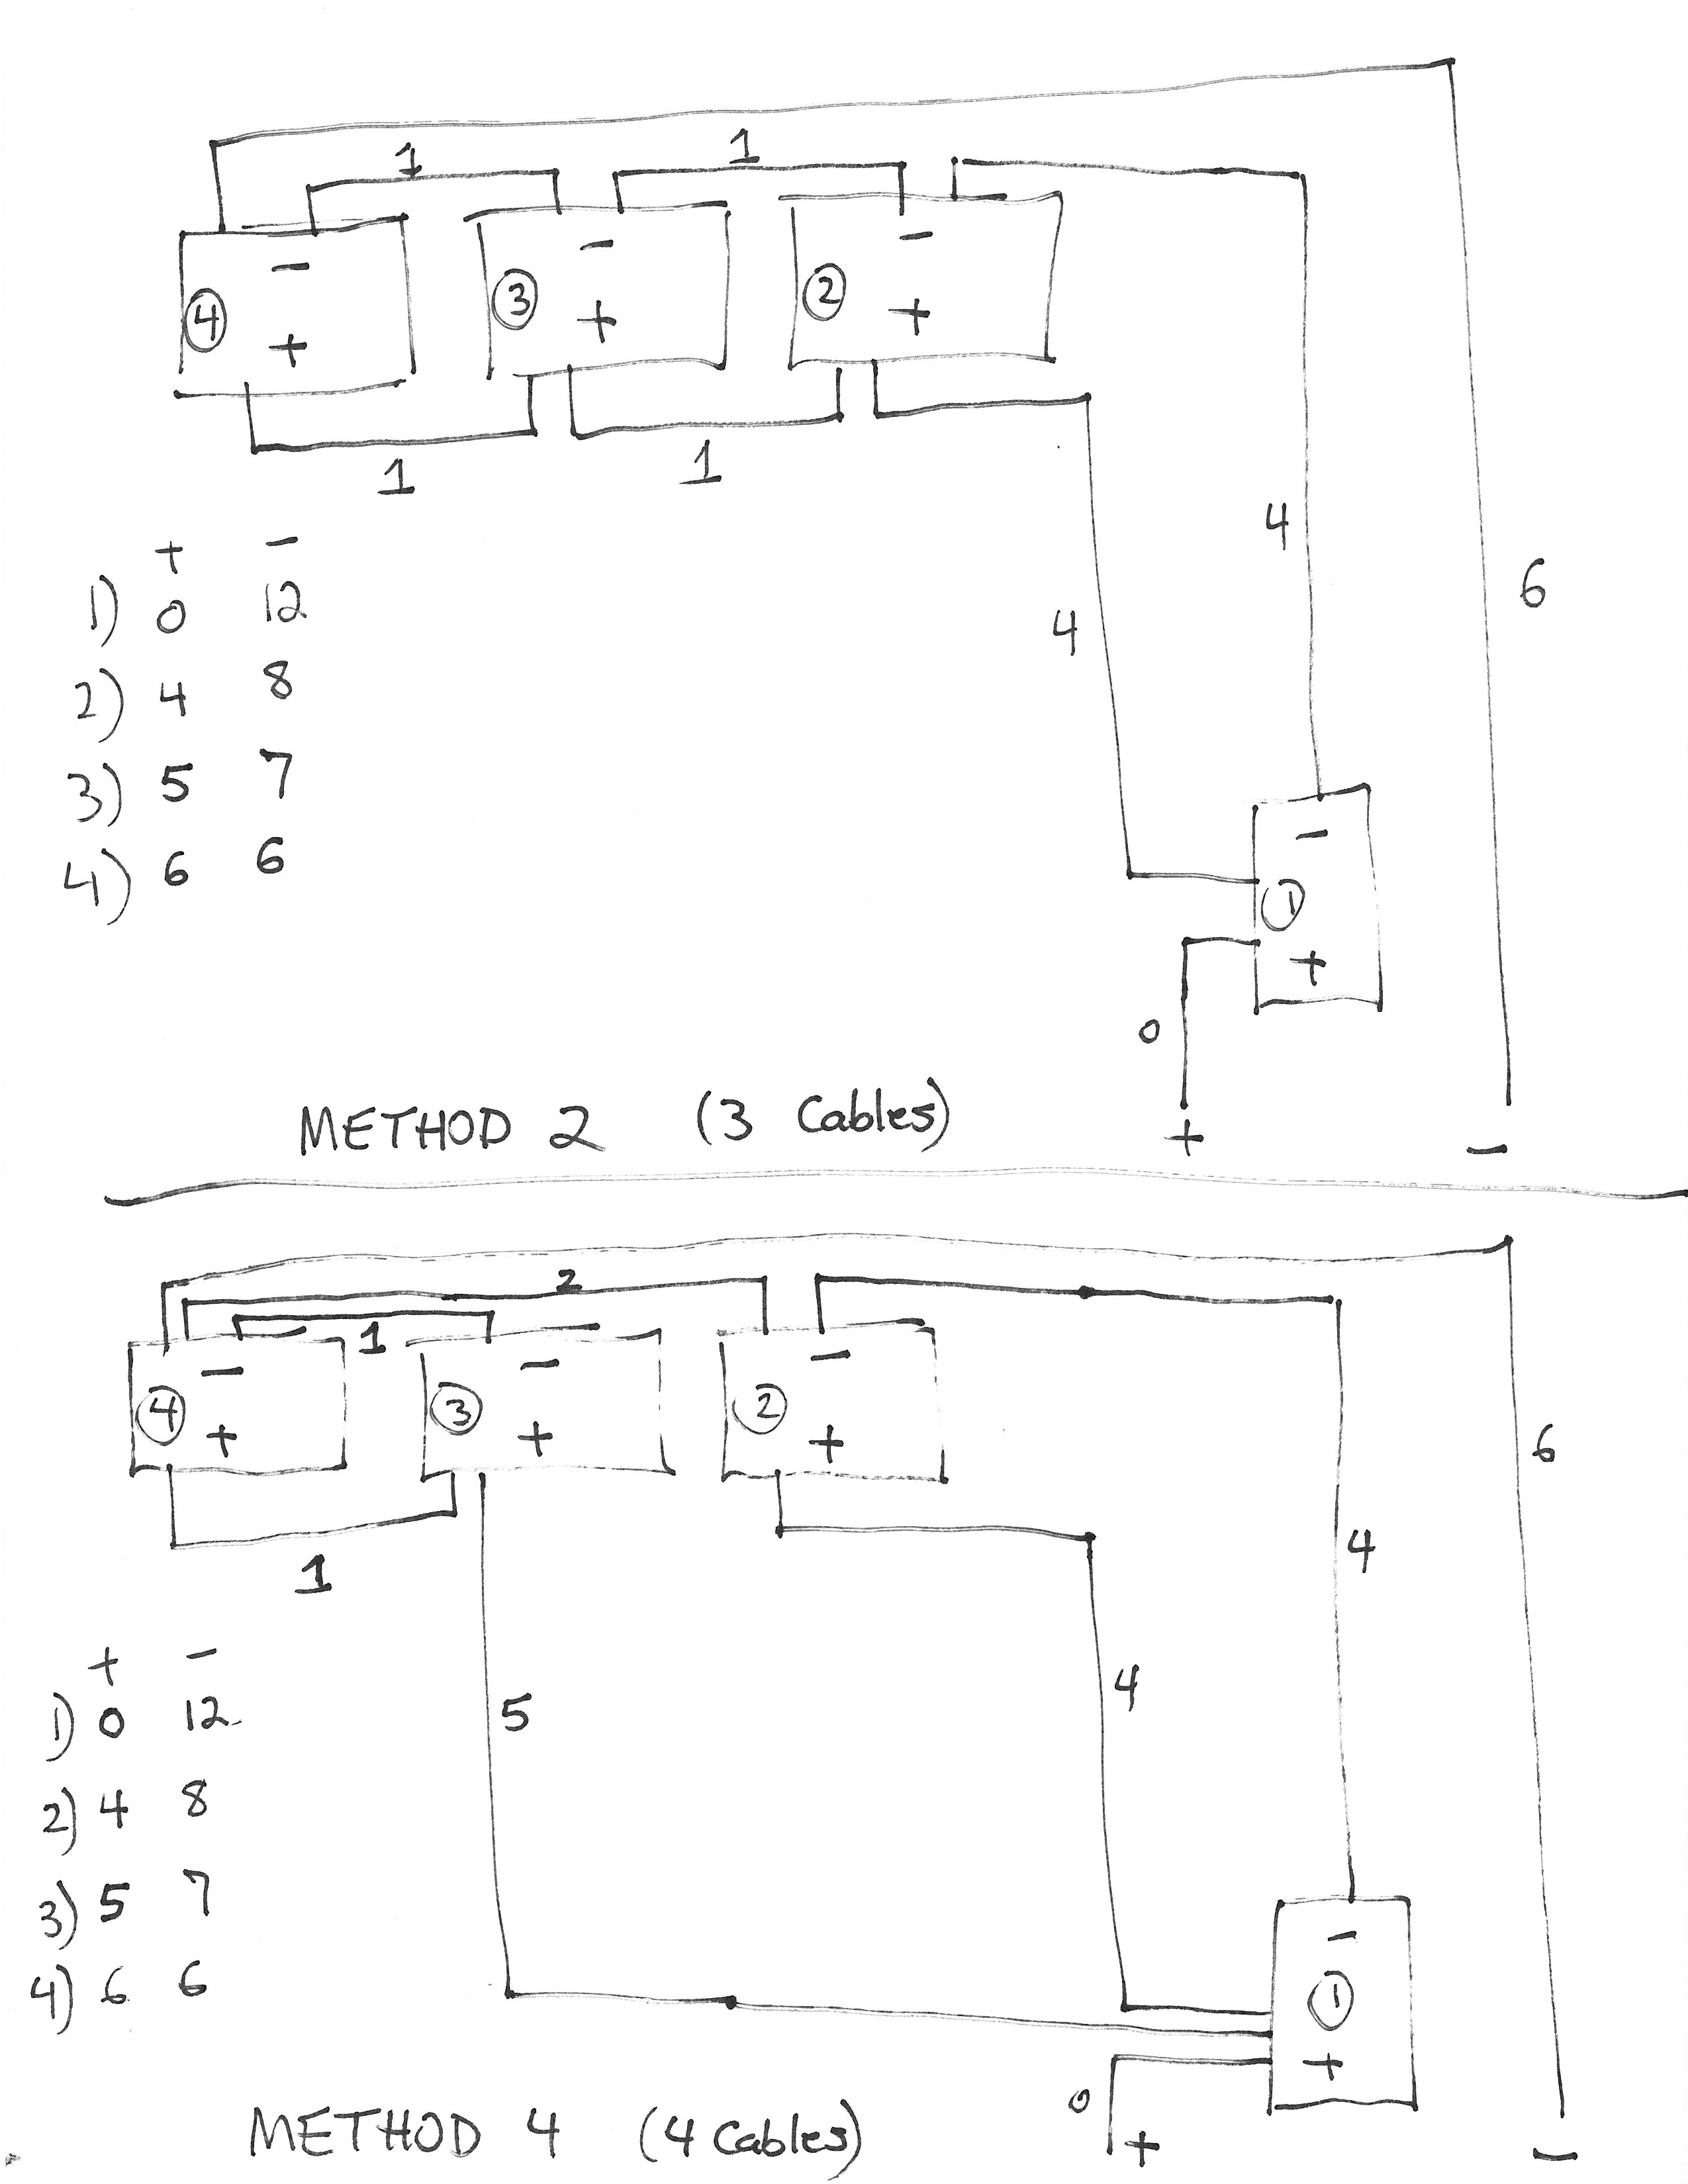
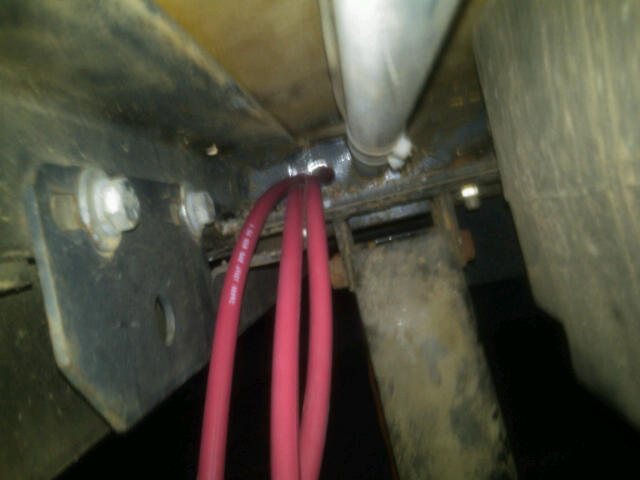
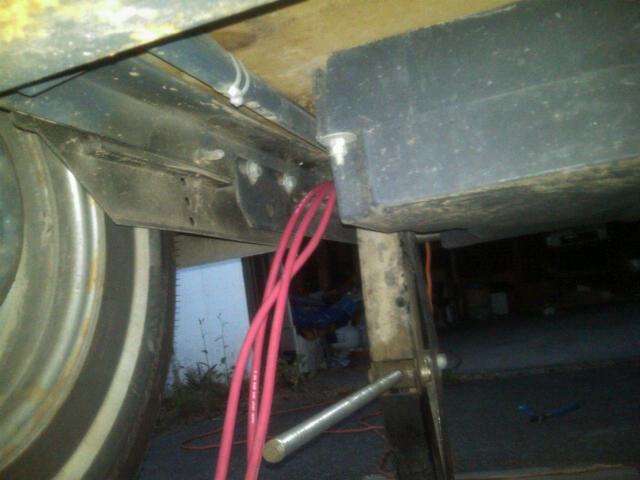
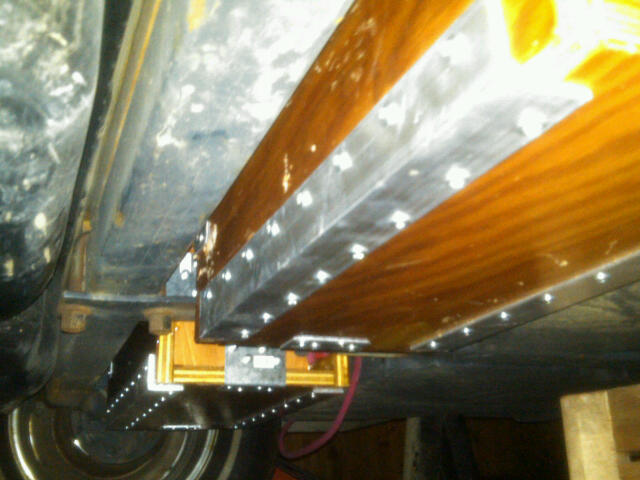
Wire gauge, probably at least a 2ga. I would prefer to see something as large as what Mick used, what are those, 1ga or 0ga? Since you are paralleling three batteries the cable tying the two underneath to the one in the electrical compartment needs to be as low a resistance as possible because of the distance in order to help maintain a balanced discharge/charge.

Cary
 
Just bought 4 Genesis NP33-12B batteries. I'm going to try to get 3 underneath the carraige. We'll see how it goes.
 
Excited to see your take on this project , Evan. This is one I wanna do some day, trying to find a place for LED underbody lights, because they run through the section you are installing batteries. Do you too have an awesome lift/jack at home?
 
Jean,

The hitch they are talking about is an option you can get so that you can carry bikes at the back of the camper. Mick and Sarah did not get this option but Evan did.
 
Jean W said:
I am really lost, how come Mick and Sarah don't have a hitch?

Jean, Here's a picture of ours with the bikes on the hitch, which is just a regular hitch mounted at the back of the tear to accept a bike rack, etc.

123781086.cpoeOah9.jpg
 
Just coming in on the last part of this battery thread, but I have and use, of course, the Yakima 2 bike rack. Works great, just keep loosing the little rack hitch lock.. pricey, $29 each time...

fpoole_SltCrk1009_O_12.jpg


Also have to be careful of the 2" sleeve, screw comes loose and the sleeve stays inside the hitch, won't slide on rack and becomes loose/wobbly...
 
This is a great thread!

Sarah (and Mick): what a wonderful mod!

Evan: I can't wait to see what you end up doing, and how your solution might differ.

Matt: Keep us posted too. I'm intrigued by your extra battery box on the tongue idea.

I have yet to order my tear, but also anticipate doing a lot of dry camping.
 
I'm getting ready to start this project.
The site that Mick referenced (http://www.smartgauge.co.uk/batt_con.html) showed four different ways of wiring the array to achieve a balanced load on all batteries.
I'm trying to decide the best method, but since this is all over my head, I'm hoping someone who understands this kind of stuff will chime in. (....hello, Mick - via proxy, that is...)

The first way is the wrong way.
The second way is MUCH better - but not perfect. (This is the method Mick used.)
Method 3 & 4 are supposed to be near perfect.

Method 3 is not practical with one battery in a separate location, so that leaves either #2 or #4.

BatteryDiagram.jpg


Method #2 means running 3 wires to the battery box underneath the trailer. Method #4 uses 4 wires.

It is important that each battery is connected with wires of similar length. In trying to compare the difference between #2 and #4, I assigned a value to each cable (roughly based on length). This way it is possible to total up the cable loop for each battery. I'm sure this isn't very scientific, because I get the same results with #2 or #4 even though #4 is supposed to be better.

Is the difference between #2 and #4 worth running the extra cable?
 
Evan,

I will pass this on to him and see what he says.

Just to let you know, I camped for 4 days/3-nights this week with no charging at all. The batteries did amazingly (more in line with what I thought would happen, and better than Mick anticipated). Before I left for home yesterday, the voltage meter was still registering 12.9v, with 4 days of use. It was slightly higher yesterday morning than the night before (12.8v), which we are figuring was caused by external temperature.

We had the fridge plugged in full time, used the lights and water pump as needed, charged my phone each night, but were not running the fan much (had a cross wind with the windows cracked and the roof vent open the whole trip. I think I could have easily gone 6-7 days without charging the batteries. We also were completely unhooked from the car the whole time.

I think you might be happy with the new batteries. I am glad Mick talked me into it!

More soon,
The Proxy :)
 
(Mick) Put all 4 batteries under the trailer in two banks and then you can link them using method 4 and only run two wires into the trailer. Delete the existing battery.
 
I've been planning this project for a while, but today I finally started to do it. My plan was to build a triple wide box to house three batteries under the trailer and put the fourth battery in the original compartment. Before I started cutting, I crawled under the trailer to measure things one more time and saw this:
Hitch.JPG


The hitch goes right down the center leaving only enough room for a double-box on either side. So, I decided to do two double-boxes with four batteries under the trailer. Of course, it would be a travesty to waste space in a teardrop, so I had no choice but to order a fifth battery to go in the original compartment.

Now that I'm going to have 5 batteries, wiring method #2 is the only one that will work. It is not 100% balanced, but it's pretty close.

Here are a few pictures from the first afternoon's work:

All jacked up and ready to drill some holes...
JackedUp.JPG


Safety First!
SafetyFirst.JPG


All the plywood for the two boxes has been pre-cut and is getting the first of four coats of sealant...
HappyWorkers.JPG


Now for the hard part - getting the three large wires from the battery compartment to the undercarriage. Mick ran his wires through the bottom of the under counter storage and put in a false bottom to hide them. If possible, I wanted to find a way to avoid running through the storage area. There was just enough room next to the conduit that brings in the wiring from the front of the trailer to drill through the plywood and angle iron directly to the undercarriage.
Wires1.jpg


Wires2.jpg


I lowered the jack to make it easier to reach the back side of the hole. (Just be careful not to poke an eye on the all thread).
Wires3.jpg
 
By early afternoon, the fourth coat on the wood boxes was dry enough to start assembly:

Very willing helper...
Assembly.jpg


I copied Mick's design for the battery boxes and then added brackets on the end pieces.
Boxes.jpg


...rubber window gasket to provide some padding for the batteries.
FinishedBox.JPG


The perfect padding for the ends of the box - pieces of an old soaker hose. Won't rot, doesn't conduct electricity, and hopefully will absorb some of the vibrations from the road.
Batteries.JPG


There is just enough space under a 560 to fit 2 double boxes, but no more. In fact, it almost didn't fit front to back. (Side to side had plenty of room.) It was very tricky getting the battery boxes wired together (around the hitch) and lifted up into place. Getting the nuts on the bolts that were up and behind the axle was the hardest part. It was dark when we finished, so I don't have a very good photo...
UnderCarriage.jpg


Underneath the mattress, there are 12 new carriage bolts with very large fender washers. I don't want to lose any batteries along the road.
Bolts.jpg


Next step is add the 5th battery (in the original battery compartment). I'm just waiting for it to come in.
 
Out of curosity are you going to replace the existing battery as all batteries should be of the same age or that is what I was lead to believe.

Looks good so far. Dave
 
Back
Top