Stabilizer Jack Maintenance

Randy

Ranger
Donating Member
I noticed after our last trip that one of the stabilizer jacks was not parallel to the ground and had a lot of play. Checked the bolts that attach them to the frame and they were very loose and may have have eventually. come off. Repositioned the jack and tightened them up. Checked the other side and they were also quite loose. Just throwing that out there, may be something you want to add to your annual preventative maintenance checklist.

Randy
 
Spring is here, camping season is upon us, it is time to lubricate your jacks! Here is my procedure:

Jack up one side quite high, with the wheel off the ground a couple of inches. Don't jack the other side at the same time or the trailer will become unstable.
0420171114-1328x747.webp

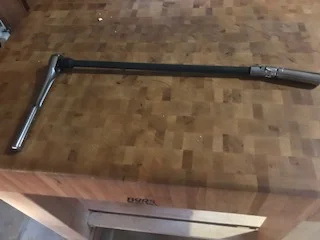
Clean everything you can see with a rag. You don't have to get anal about it, just wipe off accumulated dust, previous lubrication, and other gunk. Most important is to wipe down the long jacking screw. Then apply some grease to the screw threads that are sticking out at each end. Don't put any grease on the threads in the middle of the jack as these will never be used and grease on them will only collect more crud (don's ask me how I know). I use heavy axle grease and apply with a small disposable glue brush.

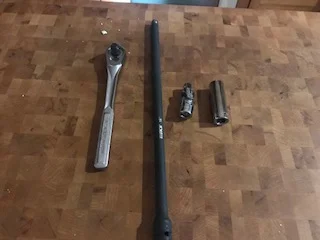
Also, check that the bolts holding the jacks to the trailer are tight (Thanks Randy!).
0420171122-1328x747.webp
0420171123-1328x747.webp

Squirt a small amount of oil on each of the six pivots. It doesn't take much, just enough to be pulled into the moving parts. I use engine weight (5w30) oil in a squirt can.
0420171123a-1328x747.webp
0420171123c-1328x747.webp


Raise the jack back up and wipe off any excess grease that squeezes out on the ends of the screw, and any oil the drips from the pivots. Now do the other side, then GO CAMPING!
 
Excellent write-up! I would like to make one addition:

As Rotus8 points out, the jack only threads through the rearmost part of the scissor. If it has been a while since the jack has been lowered: before lowering it, spray some WD-40 or lock lubricant onto the rearmost part of the screw (which is hidden away inside the rearmost part of the jack). Then take a old toothbrush to clean off any accumulated crud on the jack screw. You will likely want to do this several times as you extend the jack. Once the jack is fully extent, resume following Rotus8 directions.

The above isn't absolutely necessary, but it will make it easier to extend the jack to do the recommended maintenance.
 
The jack only threads through the rearmost part of the scissor.
Actually, at least on mine, it uses the rear most part and the very front of the thread, so clean off both front and back.

(Thanks for the up vote)
 
It has only taken me this long to reply because I've been waiting for the right combination of available time and decent weather before crawling back under the camper. I hadn't realized that the jack screw exits from both ends (some models are fixed on one end, and I wasn't sure if Camp Inn had used those jacks on some models). I had visually checked that in the past, but obviously I wasn't in the correct vantage point to see the rear screw protruding. Greasing that end has further improved the ability to raise and lower the jack, so thank you for pointing that out to me.

Since we live in our camper, we need to carry a lot of stuff with us. Which means we have to be selective about what we do and don't carry. One essential item is some graphite lube (Lock-Tite, etc), in order to keep all the locks working well. So we used that to lube the various joints of the jack. It is hard to say how well that will hold up over time, but it shouldn't attract dirt like most oils will. In about 4 years, we'll report back on how well that has worked for us (i.e. the next time that we do jack maintenance). ;-)
 
I wonder about using bike chain wax that is intended for keeping the bike chain clean in the summer/dusty environment. Perhaps it would not be as durable and would need to be lubricated more frequently. I think it is called Clean Ride. Any opinions?
 
Great thought! I suspect the main issue to be overcome is rainy conditions. Virtually anything you put on the jacks is likely to get washed out over time. Some lubes might last longer than others, but I will never be the person to volunteer to do that analysis. But newer chain lubes (which we also carry with us) would likely be at least as effective as the graphite. We chose to use the graphite because it was in a spray can, which meant that I didn't need to get as intimate with our jacks in order to apply the lube. ;-)
 
I'm guessing our jacks haven't received the annual tune-up described in this thread :)
I removed them and cleaned/lubed them as best I could. I suspect they will be a bit more functional.
I'm finding that once the jack hits the ground, incremental gains in height are pretty difficult. Is this the result of the 'crusty' threads, or is that the general experience regardless of wear and tear? -Brett
Jack before cleaning.webp
Jack cleaned.webp
 
If you are using the Camp Inn supplied jack crank, yes it is pretty difficult to make significant gains in height after the jack hits the ground. The crank is actually pretty small and doesn't give much leverage, you have to put some real weight on it. Many owners add another means of adjusting, from ratchet handles to a battery powered impact wrench. My implement of choice is a Milwaukee M18 impact wrench, though massive overkill, I carry it for other things as well and it makes adjustment of the level a piece of cake, though a little loud in a quiet campground. Another downside of using a power tool is not noticing if the jacks need maintenance, it is easy to simply overpower a problem, and cause a bigger one by twisting something apart.
 
Thanks @rotus8 I'll see if I can find a better crank with more leverage. Sounds like that would be the simplest (and quietest) solution. -Brett
 
Lacking the awesome drill that Rotus has (I definitely have drill envy ), I use my regular cordless drill to get the jack to the ground. If I need to go higher, I utilize a socket driver with 3/4 inch socket, 18 inch extension and socket "angle adapter" which keeps me from having to stoop over so low in my old age. Got the extension and angle adapter from Northern Tool.

Klutch Universal Joint — 1/2in. Drive | Adapters, Extensions Joints| Northern Tool + Equipment
Klutch 18in. 1/2in. Drive Impact Extension Bar | Air Socket Accessories| Northern Tool + Equipment
full

full
 
Last edited:
Like ROTUS I use a Dewalt impact driver. Only takes seconds and no effort. Keep the stock crank on hand for emergency purpose. Last trip gone 18 days had just enough battery.
 
Great idea! I'm ordering some today. However, you really want 1/2" x 12" lag bolts, or possibly a bit shorter. The ones you indicated have a 1-1/8 head and are much too big (and expensive). These may be more appropriate: (15) Galvanized Hex Head 1/2 x 10" Lag Bolts Wood Screws: Amazon.com: Industrial & Scientific. They have a 3/4 inch head, the same as the jack screw drive and are 10" long which seems plenty long.

I also suggest picking up some 1/2 inch washers to keep loops from slipping over the bolt heads.
 
I think you're right Rotus on the cost/size being too much. I picked those out just as an idea to demonstrate the concept but something smaller and cheaper should work fine. With a good drill or impact driver you can drive these screws into almost any ground surface. The important thing is to just take the socket into the hardware store and make sure it fits. I picked up 8 or so at Lowes for around $2 each.
 
Back
Top