Sweeney
Administrator
I killed my battery again. It seems 2 years, and 3 months is what I get out a lead acid. Lasting that long means my battery will need to be replaced at least 4 times in the next 10 years.
Since I killed my battery, I'm anticipating that I will be upgrading to the Lithium battery, I first wanted to replace the charger anticipating this. I actually did this and found I killed the battery as I was doing this.
Next, I reconfigured the CTEK, added a Victron (Done, but I'll talk about it later), and then of course, there's the battery itself. That is once I find a place to buy the battery. Continental/Progressive has probably the worst customer service I have EVER seen.
More on that once I figure out how to get my hands on one, any advise is welcomed....
Take this as a draft, the big notes are here --- but I lost a few photos along the way....it hits the 'big picture' for a 2021 at least --- not sure where the CampInn designs change in the batterybox/charger...
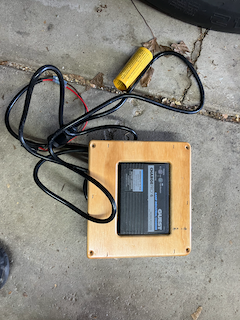
Removal of legacy charger
Removal of the old charger is fairly straightforward. First, of course, disconnect and remove the battery, and unplug the trailer from shore power. You may notice some lights on mine, rest assured when I did the actual removal power was removed.
The Legacy charger is held in place in a bezel with four wood screws. Note the length of these screws; they are slightly larger than other screws that you will need to remove during this operation.
Upon removal of the four screws, the charger bezel is easily removed, giving access to the electrical wires hidden behind.
The side panel needs to be removed. There are 4 wood screws, one in each corner. These need to be removed, and the side panel will easily be removed. My camper is equipped with the Autowbrake (sic) — I unplugged it so that I could have some additional room. This is not necessary, but it made things easier.
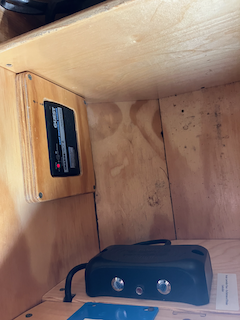
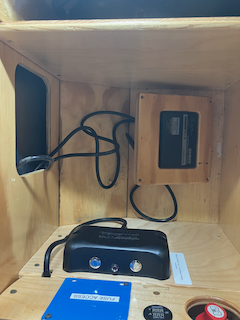
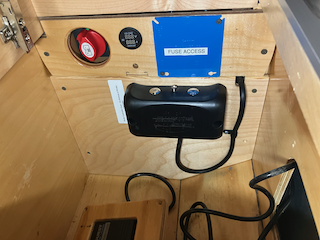
Battery Compartment
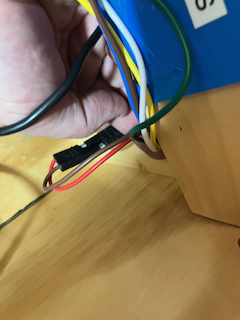
You will notice the master cutoff is oriented vertically, and the LED volt meter is not lit, power is disconnected from the 12-volt system and not visible, is the shore power is disconnected, remove the 4 screws that hold on the battery cover, one in each corner. Find a 2-connector quick disconnect, separating the two halves.
The second connection is the 110 volt connection — this is found in the upper portion of the battery box, again there are 4 screws that remove it and the plug/socket will be immediately obvious.
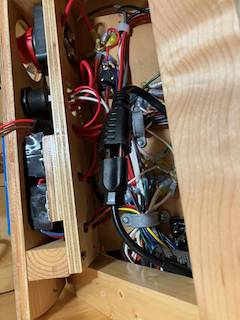
Detail of power connection
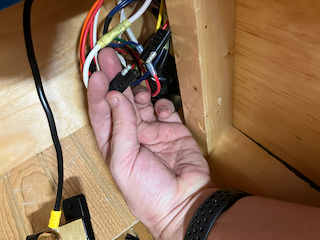
Quick Connect
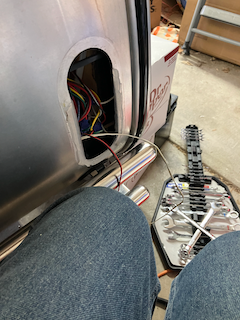
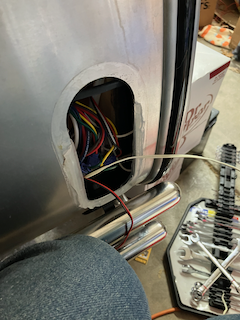
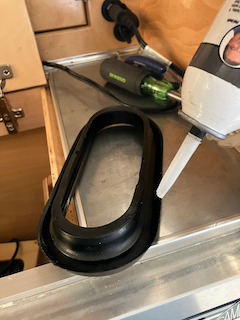
You will need to remove the tail light. The 110 plug that feeds power from shore power to the old charger is impossible to remove without first taking off the tail light. Getting a photo of this is impossible, so I will do my best to describe the process.
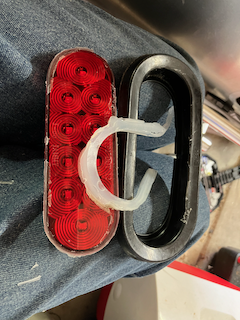
From behind, the tail light needs to be pressed out, a rubber ring surrounds it. You should be able to press from inside the battery box on the top or bottom edge of the plastic fixture. It is held in with a bead of silicone, it may take some pressure to break. If you disturb the rubber ring, re-seal it as I did. Silicone is a single use sealant. Once it is moved, it is unreliable.
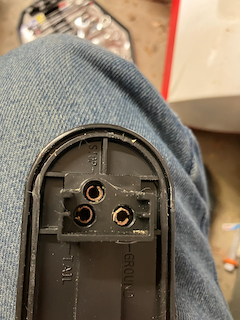
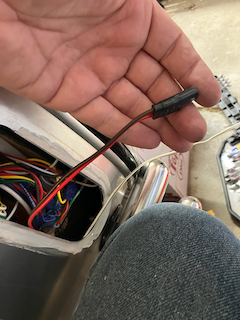
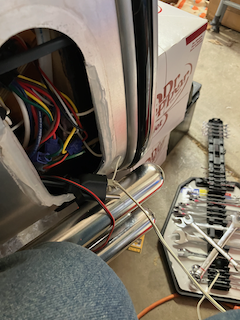
Fishing Wires
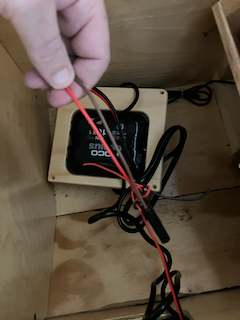
From here you will easily be able to maneuver the plug from the old charger and the quick connect port. Attach a string of some kind to each and then pull the old charger out leaving fish lines in place. Once you pull the wires through, simply attach the new chargers plug and wires and pull them back through the opening.
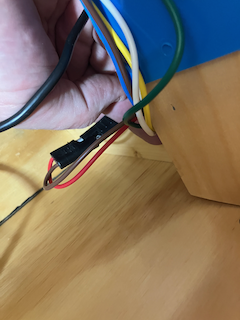
Plug the new charger into the 110 volt socket, the 12 volt quick connect and we’re almost done.

Home Stretch
From the rest is pretty much just reassembly. Reroute wires to minimize tangles, and ensure things are tidy.
Reassemble the tail light assembly, ensuring that you don’t forget to plug it in, as well as ensuring the silicone has been replaced, and that it all looks great.
Reinstall the battery, double checking your polarity is correct (Red + / Black -) and that you haven’t forgotten to plug anything back in.
Gone but not forgotten

Detail of power connection
Detail of disconnect
Tail Light Ring
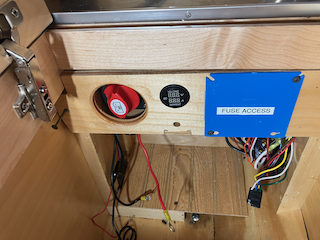
Box detail
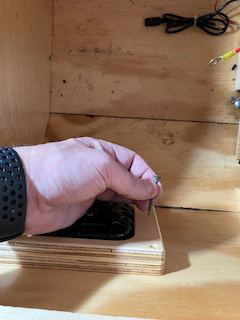
Screw replacement
Final Notes
The job is moderately difficult, but not, taking only a few hours to complete. The hardest part for me was figuring out how to remove the tail light. I don’t think I would have needed to reseal the outer ring had I pushed the light out.
Not included in the time estimate was the installation of a Victon Smart Shunt; this probably added 30 minutes.
One trick an old timer taught me is when you are putting the screws back in — don’t just “drive ’em home” — turn them backward until you feel them “hop” — this, then, righty-tighty until they are snug. This ‘hop’ you will feel when turning left, is the screw re-aligning with the previously cut threads. This will keep you from being as prone to stripping them out later. This trick can be done to plastics, too. next time, you have to replace a battery in a remote or toy that has a plastic back.
This is a moderately difficult job, but only because of the tail light removal. Camp Inn takes pride in space-saving to give you the most storage possible. This is the trade off for that — sometimes repairs may be a little more difficult.
The only tools needed were a Phillips screwdriver, a tube of silicone, and a wrench to tighten the battery lugs.
Since I killed my battery, I'm anticipating that I will be upgrading to the Lithium battery, I first wanted to replace the charger anticipating this. I actually did this and found I killed the battery as I was doing this.
Next, I reconfigured the CTEK, added a Victron (Done, but I'll talk about it later), and then of course, there's the battery itself. That is once I find a place to buy the battery. Continental/Progressive has probably the worst customer service I have EVER seen.
More on that once I figure out how to get my hands on one, any advise is welcomed....
Take this as a draft, the big notes are here --- but I lost a few photos along the way....it hits the 'big picture' for a 2021 at least --- not sure where the CampInn designs change in the batterybox/charger...
Removal of legacy charger
Removal of the old charger is fairly straightforward. First, of course, disconnect and remove the battery, and unplug the trailer from shore power. You may notice some lights on mine, rest assured when I did the actual removal power was removed.
The Legacy charger is held in place in a bezel with four wood screws. Note the length of these screws; they are slightly larger than other screws that you will need to remove during this operation.
Upon removal of the four screws, the charger bezel is easily removed, giving access to the electrical wires hidden behind.
The side panel needs to be removed. There are 4 wood screws, one in each corner. These need to be removed, and the side panel will easily be removed. My camper is equipped with the Autowbrake (sic) — I unplugged it so that I could have some additional room. This is not necessary, but it made things easier.


Battery Compartment
You will notice the master cutoff is oriented vertically, and the LED volt meter is not lit, power is disconnected from the 12-volt system and not visible, is the shore power is disconnected, remove the 4 screws that hold on the battery cover, one in each corner. Find a 2-connector quick disconnect, separating the two halves.
The second connection is the 110 volt connection — this is found in the upper portion of the battery box, again there are 4 screws that remove it and the plug/socket will be immediately obvious.

Detail of power connection

Quick Connect
You will need to remove the tail light. The 110 plug that feeds power from shore power to the old charger is impossible to remove without first taking off the tail light. Getting a photo of this is impossible, so I will do my best to describe the process.
From behind, the tail light needs to be pressed out, a rubber ring surrounds it. You should be able to press from inside the battery box on the top or bottom edge of the plastic fixture. It is held in with a bead of silicone, it may take some pressure to break. If you disturb the rubber ring, re-seal it as I did. Silicone is a single use sealant. Once it is moved, it is unreliable.


Fishing Wires
From here you will easily be able to maneuver the plug from the old charger and the quick connect port. Attach a string of some kind to each and then pull the old charger out leaving fish lines in place. Once you pull the wires through, simply attach the new chargers plug and wires and pull them back through the opening.
Plug the new charger into the 110 volt socket, the 12 volt quick connect and we’re almost done.


Home Stretch
From the rest is pretty much just reassembly. Reroute wires to minimize tangles, and ensure things are tidy.
Reassemble the tail light assembly, ensuring that you don’t forget to plug it in, as well as ensuring the silicone has been replaced, and that it all looks great.
Reinstall the battery, double checking your polarity is correct (Red + / Black -) and that you haven’t forgotten to plug anything back in.

Gone but not forgotten

Detail of power connection

Detail of disconnect

Tail Light Ring

Box detail

Screw replacement
Final Notes
The job is moderately difficult, but not, taking only a few hours to complete. The hardest part for me was figuring out how to remove the tail light. I don’t think I would have needed to reseal the outer ring had I pushed the light out.
Not included in the time estimate was the installation of a Victon Smart Shunt; this probably added 30 minutes.
One trick an old timer taught me is when you are putting the screws back in — don’t just “drive ’em home” — turn them backward until you feel them “hop” — this, then, righty-tighty until they are snug. This ‘hop’ you will feel when turning left, is the screw re-aligning with the previously cut threads. This will keep you from being as prone to stripping them out later. This trick can be done to plastics, too. next time, you have to replace a battery in a remote or toy that has a plastic back.
This is a moderately difficult job, but only because of the tail light removal. Camp Inn takes pride in space-saving to give you the most storage possible. This is the trade off for that — sometimes repairs may be a little more difficult.
The only tools needed were a Phillips screwdriver, a tube of silicone, and a wrench to tighten the battery lugs.